
Brews: Ginger Beer
Brewing my own beer is on my bucket list, but this post is not a bucket list post. This is my first "Brews" post. These will be used to talk about any alcohol related adventures that do not relate to my list. Although this ginger beer was alcoholic I decided it did not count as brewing my own beer, as it was not the same process. To start with, I ordered a kit off of Etsy from Sandy Leaf Farm:
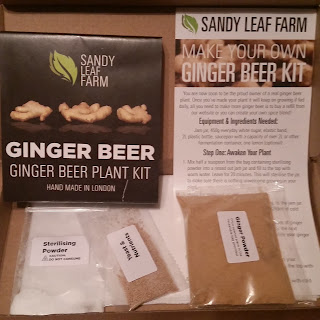


Photo by Poison Megz
The kit contained nearly everything needed to brew your own batch of ginger beer, save for the containers, water, sugar, and an optional lemon. The first step was to grow your ginger plant in a sterilized jar. (So really the first step was to sterilize a jar.)

Photo by Poison Megz
I just used a jam jar I had. After it is sterilized and rinsed then you added water, ginger, sugar, and that optional lemon juice. I actually added a squeeze of fresh orange juice as that was what I had on hand. The jar gets covered with muslin and a rubber band (or bright pink hair tie...you know, whatever you have.) You feed it with ginger and sugar every day for a week.

Photo by Poison Megz
After those seven days are up you take a much larger container to use for fermentation, sterilize that, add a bunch of water, more sugar, the remaining ginger, and the ginger plant. That gets covered with the muslin cloth and a rubber band. In my case a stretchy hair tie, because I do not have giant rubber bands laying around.

Photo by Poison Megz
So that gets to ferment at room temperature for three days. At the end of those three days you need a funnel and a sterilized 2 liter bottle. (or if you're me and somehow made too much, you need extra bottles.) Line a funnel with a muslin cloth and pour your ginger beer into the bottle leaving about 2 inches of room. Squeeze the air out of the bottle so the ginger beer reaches the top and screw the lid on. Leave out until the bottles become rigid from the buildup of Carbon Dioxide. At that point you can let the gases escape and refrigerate to drink when cold or you can squeeze the air out again for a dryer result. I squeezed the air out a few times before refrigerating.

Photo by Poison Megz
And then when it's cold you get to drink it! The instructions say if it's too dry to add some more sugar. It was a bit bitter so I stirred some sugar in to each glass I had. I would definitely add a ton more ginger next time because I am a ginger ADDICT and it did not have enough of that ginger bite for me. It was nommy though.

Photo by Poison Megz
I also had a glass of it with some ice and bourbon added in which was delicious. Ginger beer+Bourbon=Soulmates. All in all it was a slow but delicious adventure. Plus it was really neat to be drinking something that I made. The kit was really easy to use, so I recommend it if you want to give this a shot! You can also keep the ginger plant growing repeatedly so you have a new batch every 10 days or so. I chose not too due to a lack of space, but that certainly makes the kit worth the cost (which is not even that high to begin with.)
xoxo
Poison Megz


Comments
Post a Comment